
 Find Your
 What Is Google Places?
Ever type something into the Google search box for a particular city? When the results came up, there were a few listings right beside a map at the top of the page – those are listings on Google Places.
Many florists are unaware that registering & claiming your Google Places listing is free and controlling your information is beneficial. Since Google pulls information from many different sources, you may find that Google has “holes” in their data about your shop. It is important that Google has your updated information and that it comes from YOU to make sure it is correct. Unclaimed listings can be claimed by others who might not put your best foot forward. Your Google Places listing is also another platform for marketing.
Controlling local information is a free way to get the word out about your flower shop, which is why Flower Shop Network wants you to know how to claim your shop’s Google Places listing.
How To Claim Your Google Places listing
To help you get started, FSN has created a quick summary of how to claim your Google Places (Local) listing. As a visual guide to walk you through the setup, view the gallery of screenshots below these instructions. (To view the full screenshot, simply double click on the picture you would like to see.)
**Note: You will need a Google account to create a Google Places listing. If you do not have one, skip below to the section called “Creating A Google Account” then return to the Google Places section**
First, go to the Google Places home screen. Here you will input your Google account log-in information. Sign in as if you were signing into your email account. Enter your email address (for your Google Account) and password then click “sign in”.
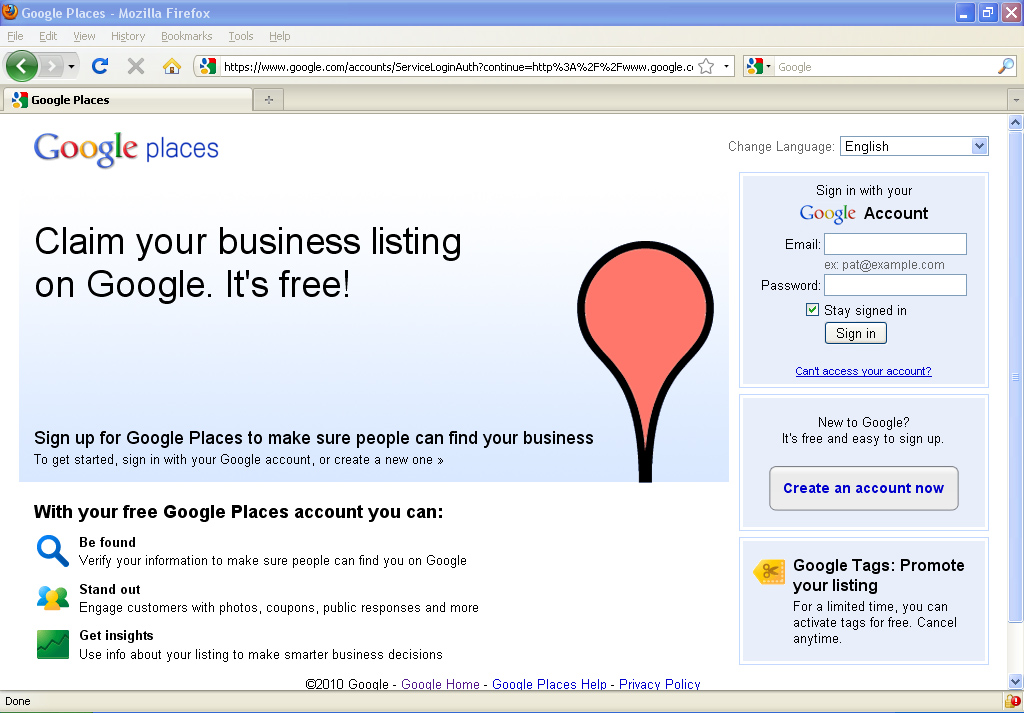
*If you do NOT have a Google account, you MUST have one to proceed. See section below titled “Creating A Google Account”.
Your email address will be posted at the top right of each screen. This is standard and will not affect your listing. If you do NOT see your information at the top of each screen, you are not logged in or could be logged in using an incorrect address. Verify this information on this screen before proceeding as this will be the log-in that will be used for your business information.
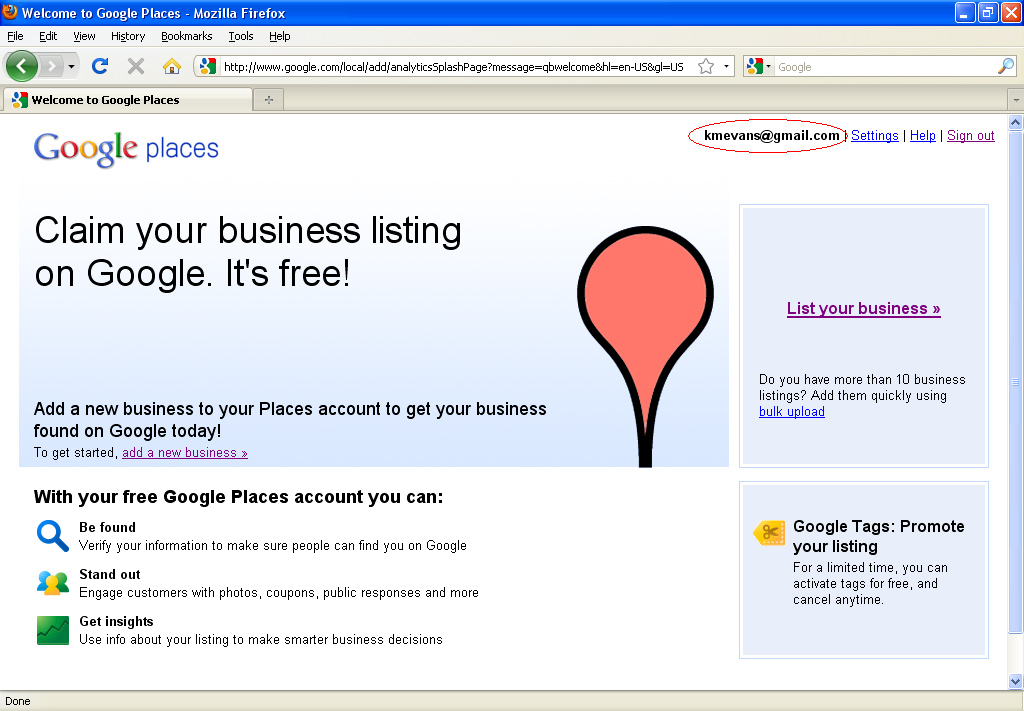
Next, you will see a link to the right which says, “List Your Business”.

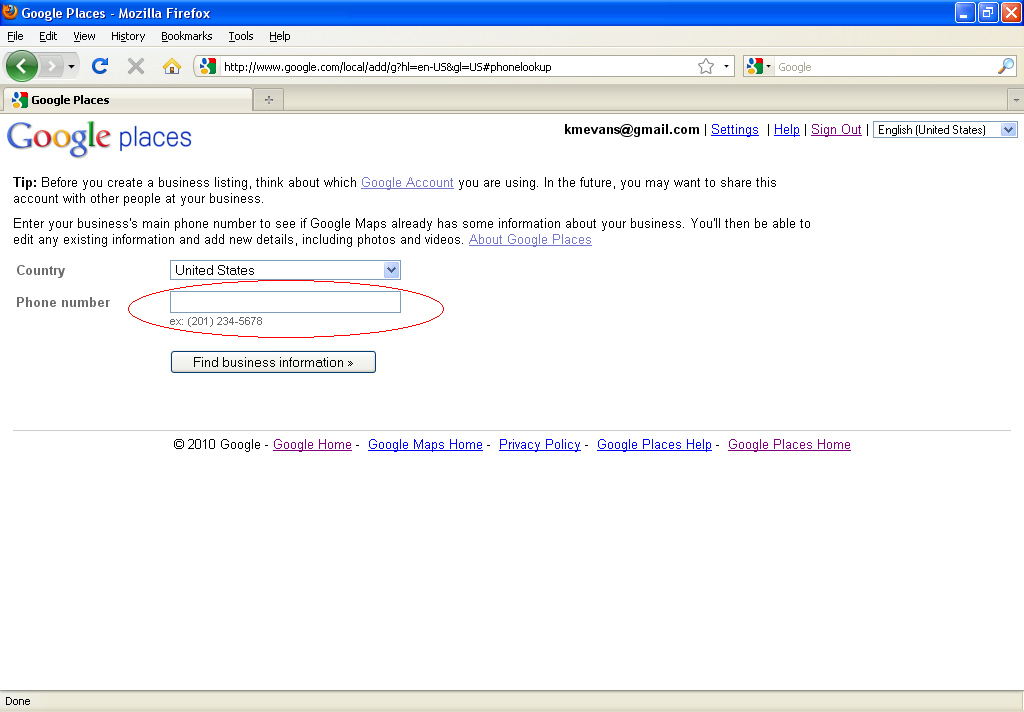
Clicking this link will prompt Google to ask for your business phone number. Enter your phone number and click, “Find Business Information.” This will cause Google to pull the information they currently have associated with your business phone number.
Now click on the “Edit” button next to the address. If your information does NOT appear, Google will automatically route you to the page that has your basic shop information.
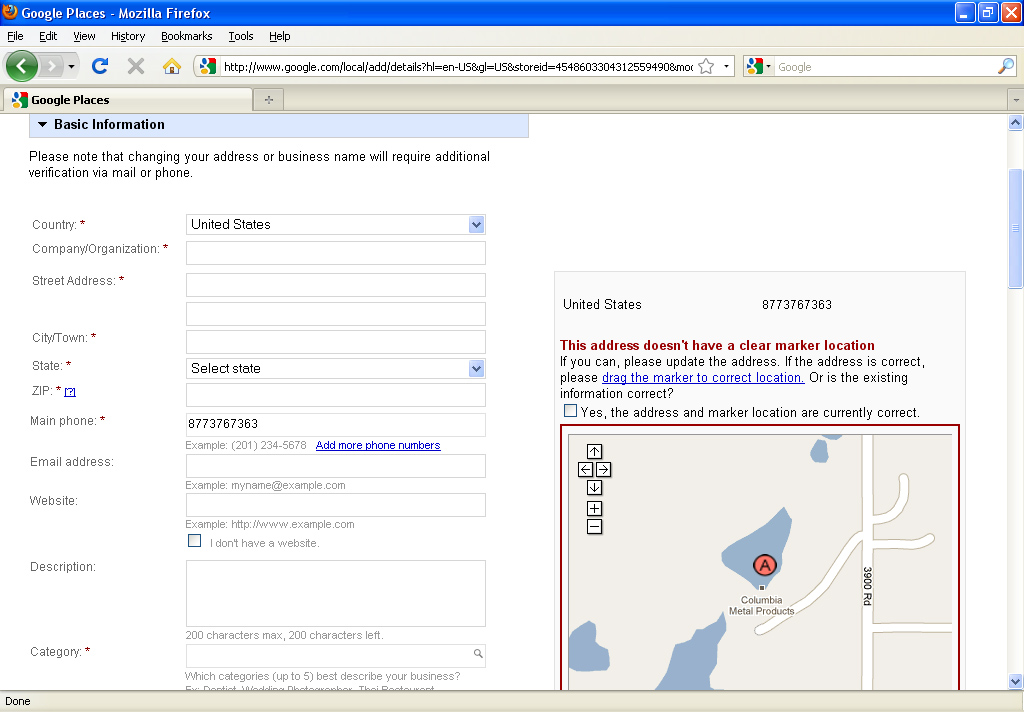
Here you will be asked to enter:
Company/organization name
Physical street address (No P.O. Box addresses)*
City
State
5-digit zip code
Main phone number (If you have an 800 number, click on the “alternate phone” link below the phone # box to add)
PRIMARY email address**
PRIMARY website***
Description**** of your shop and services.
*Since Google Local listings are based on physical address you will be asked to enter this information. Entering accurate address information is crucial in later steps. A second address line is provided for your suite number or similar information if applicable.
***Enter your Flower Shop Network website address where it says “website”. If you also have other websites, you will be able to add these in a later screen.
****Your description is very important. This will display along with your shop’s information. Do not list the name of your flower shop here. Instead, list the CITY and STATE where your shop is located along with a list of your specialties. For example, “Miami FL florist delivering unique flower arrangements for all occasions. Specializing in wedding flowers, funeral flowers and balloon bouquets.” Of course, tailor this to your shop.
Under description will be a box that says “Categories”. Your main category should be “florist”. If you are a florist or a flower shop put “florist” or “flower shop”. If you specialize in “wedding flowers” put “wedding shop” or something similar. Proceed like this until your shop has been assigned to a category for all of your specialties. This helps Google Local index your shop and pull up your results faster when those specific categories or terms are searched.
Next it will say “Service areas and Location Settings.” You will be asked if you serve customers at your physical locations. Click “Yes”. This will cause a drop down box with more information to appear.

This will also give you the option of NOT listing your address on Google Maps. However if you have a storefront, we recommend listing your physical address so customers may shop at your location. You may list either a delivery area distance or you can list the cities/zip codes you deliver to individually (what we recommend). This will indicate to Google that you serve these areas when customers search for florist in the cities you serve. Click the box that says, “List of areas served” and type in City/ST and click “Add” after each combination. Your map will start building to the right side of the page. If Google does not know the exact proximity of a city, they will ask you to set how far in and around the city you deliver in miles. Enter this information and click on “Set”.
Just below is a section asking for your hours of operation. Here you will list your business hours, Monday through Sunday, that your shop is open. You can choose not to list this information.
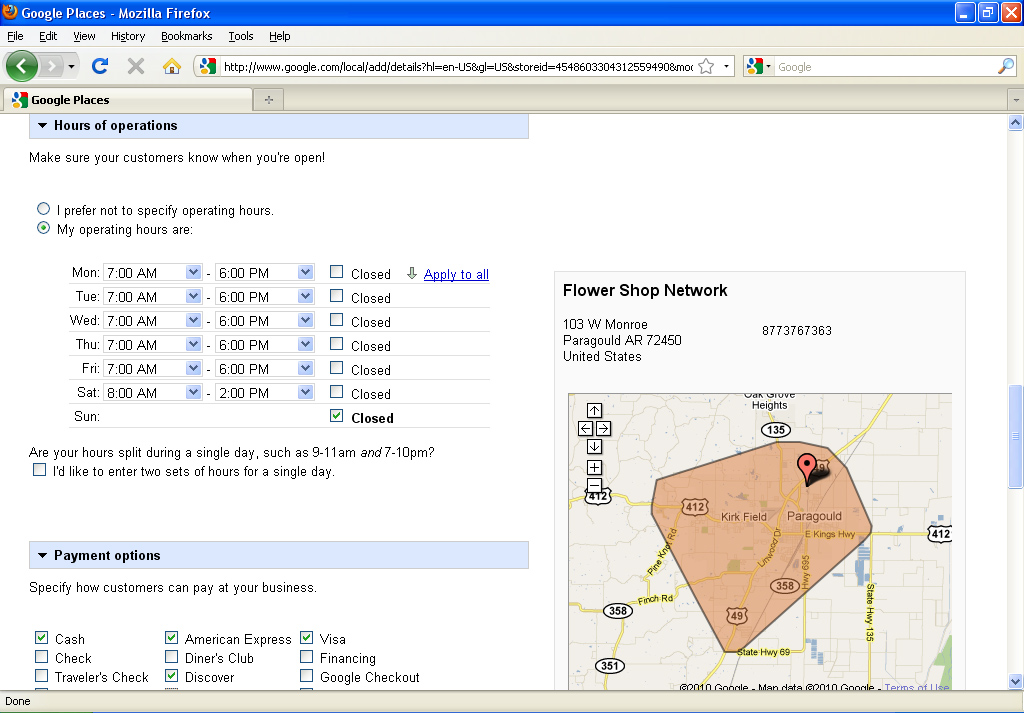
If you’ll notice, clicking “my operating hours are” will list those hours underneath the map at the bottom. They disappear when you click “I do not wish to display my 0perating hours”. If you do wish to edit this information, click the round button next to “my operating hours are” which will unlock the hours boxes.
If you have split hours on any day, click the round button next to “my operating hours are” then click the square box at the bottom of the section that says “I’d like to enter two sets of hours for a single day.” This will open a separate set of boxes (but keep any previously entered information) that will allow you to enter your split hours.
The next section on the page lists payment options. Here you can fill out whether you accept certain credit cards and electronic funds transfers (such as Paypal) or prefer check/cash.
Below the payment section are sections for photos and videos. You are not required to upload any information here but may upload any photos of your shop or arrangements that you think will be helpful.
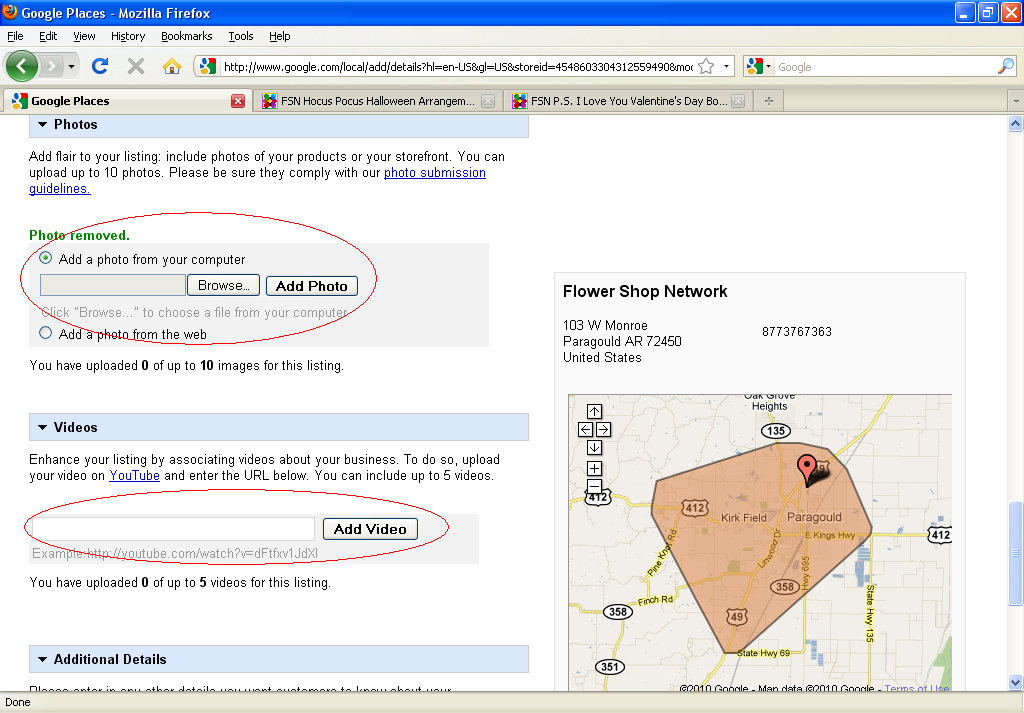
You may add up to ten photos on this page. You may also upload YouTube videos of your shop. This is a fun place for customers to be able to quickly view the outside of your store, making it easily recognizable when they visit!
Below this is a section called “additional details” which is one of the most important boxes on the page. This is where you will add any additional information about your shop such as additional web site addresses in this area.
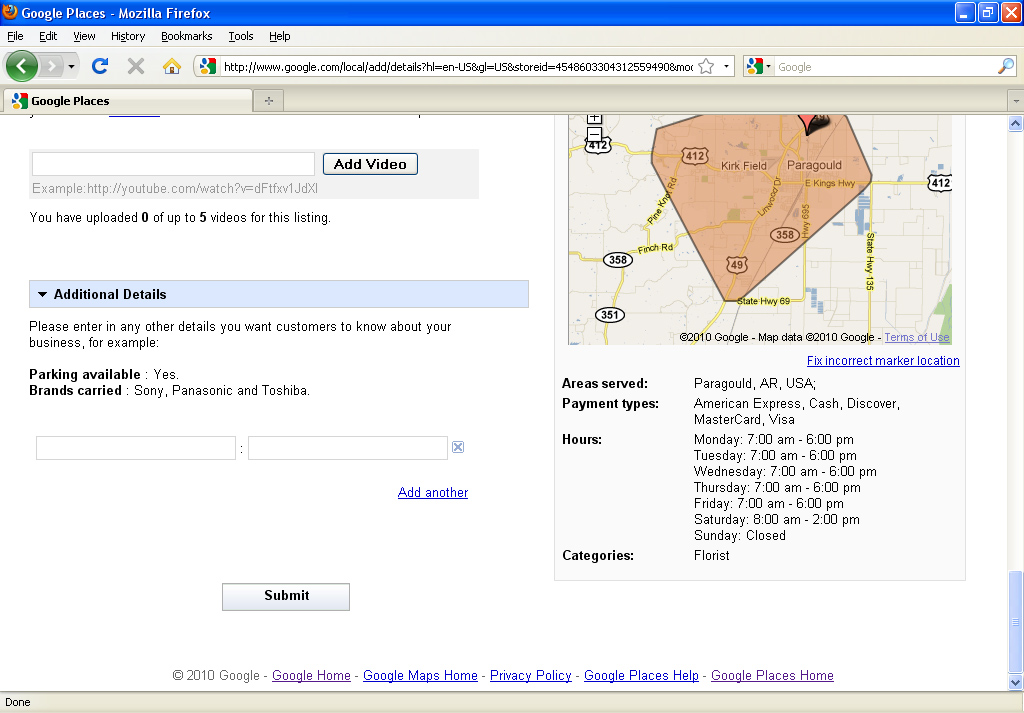
We recommend typing in the left box “Flower Shop Network Member” and the right box “Yes”. Click on “Add another” and in the left box you can type “Neighborhood” and the right box “Midtown, Central (or your sub-division here)”. Once all information has been entered on this page, click the “submit” button below “additional details.”
The next screen will give you options for how to validate your listing. This simply proves to Google that you are not a spammer and that you do indeed own the business which you are claiming.
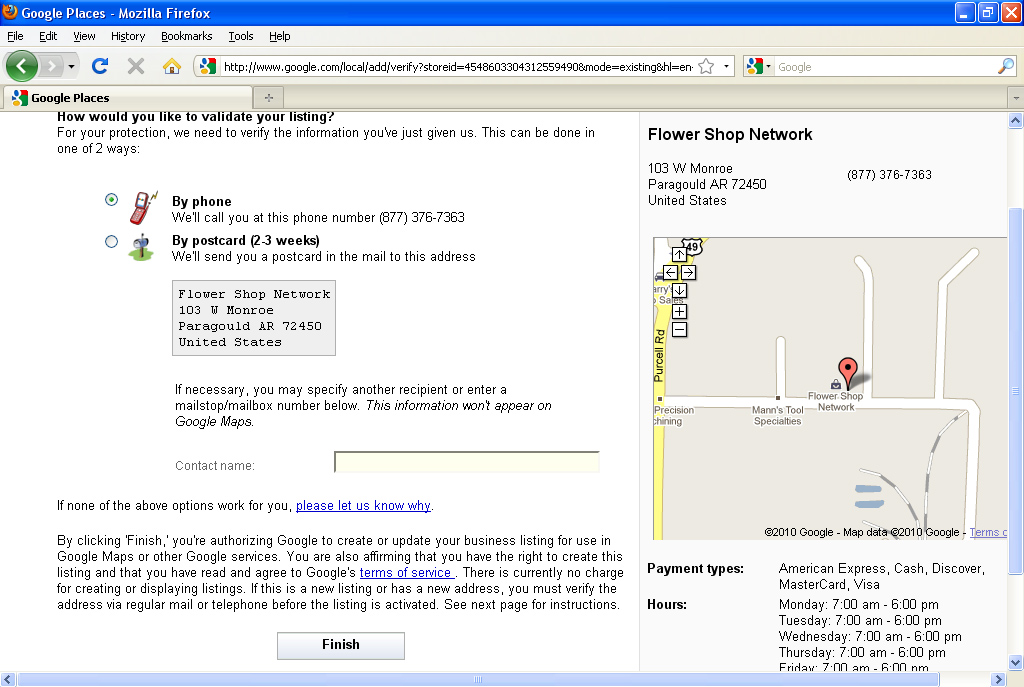
You have two options: phone or postcard. The fastest way to claim your listing is to validate it by phone. To do this, click the round button next to the phone icon. Make sure that the information shown is accurate and then click “Finish” at the bottom of the screen.
Google will call you shortly with a 5 digit PIN which you will be asked to enter on the next screen. If you choose to validate by postcard, you will have to come back to the screen after they snail mail the post card to you and place the pin number in the box provided.
Next you will see a screen that lists the listing(s) for which you have entered information. Wait for your PIN then enter it in the box provided and click “Go”. That’s it! You will receive a message stating, “We have confirmed your pin and validated your listing.” If you have an additional location, click the link that says, “Back to Google Places” and repeat this process for your other location(s).
Creating A Google Account
 It is very quick and easy to create a Google account. If you have entered an alternate email account, you may be asked to confirm your registration by clicking on a link inside an email that is automatically sent to your non-Google account.
This is the first screen that you should see. There is a box under the sign-in section that says “New to Google?
It’s free and easy to sign up.” Click the button below this that says “Create an account now.” This will take you to a new screen that asks for additional information.
 The next screen will ask for your current email address. You will also be asked to create a password and re-enter it. Re-entering the password helps make sure that no typos were entered which will make logging in more smoothly later. Since only dots appear, you could think you are typing “dogbreath” and are actually typing “dgobreath”. Re-entering the password catches this if the passwords are not entered exactly the same both times.
The password that you enter here should be at least 8 characters. A “safer” password usually includes both numbers and letters. There is a gauge at the side that shows “strong” or “weak” as you are typing your desired password. Google will accept the password only when it reads “Strong” (is 8 characters or more).
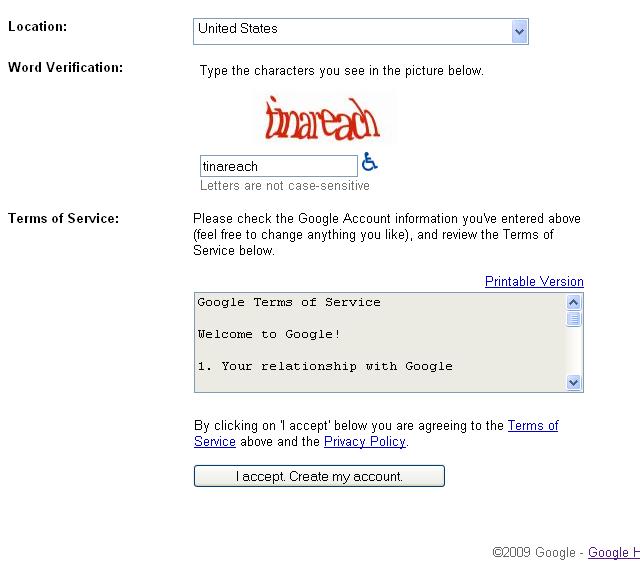 You will also be asked to enter your location and a verification word called a “captcha.” “Captchas” let Google know that you are not a real person instead of a computer. (Spammers use computer programs to automatically enter form information. They cannot read captchas.)
You may wish to read the terms of service. Google will ask you to verify that you agree to them. After entering all of the information, click “I accept. Create my account.”
Now you will be asked to verify your email address. Google will have sent an email to the email address you registered to verify that the account is valid. The subject line typically reads, “Email Verification”. They will ask you to click on a blue link in the email to fully activate your Google account. When you have done this, the page should say, “thank you your account has been activated”. It will also ask you to add a mobile phone #, which is not necessary, as we can always re-set your password to your email if necessary. Click on the link that says, “Click here to continue”. Now you are able to go back to the Google Places screen and claim your Google Local listing!

I WANT TO CREATE A GOOGLE ACCOUNT
I would like to get as much publicity that I can thank you
Google is the place to be!
Your article has proven useful to me. It’s very informative and you are obviously very knowledgeable in this area. You have opened my eyes to varying views on this topic with interesting and solid content.