Home Shop Flowers Bloomin' Blog Find Florists About FSN Contact FSN Florists Only!
Find Your Local Florist:
Home Shop Flowers Bloomin' Blog Find Florists About FSN Contact FSN Florists Only!

Marketing Made Easy: Creating A Direct Mailer

HOW DIRECT MAILERS WORK FOR YOU

Working in conjunction with other marketing campaigns, direct mailers are a very cost effective way to reach your customers. Direct mailers are great for your customers who do not have Internet access. Direct mail also serves as a holiday gift reminder for existing and potential customers. When you want to keep your shop’s name at the front of their minds, direct mail is a simple and cost effective way to do it.

When To Send Direct Mailers: A general rule of thumb is to send direct mailers 7-10 days before the major floral holiday. Earlier than this makes it easy for the reader to forget or disregard the mailer. 7-10 days prior to the holiday reminds the customer to order, prompts he or she to order early, and keeps your shop in the front of their mind when considering holiday gifts.

What Holidays/Events Are Appropriate To Send Direct Mailers: Sending direct mailers before any major floral holiday is a potential boon for your flower shop. Prom is also a very important occasion. The early part of the wedding season in your area is also a good time for sending direct mailers.

To Whom Should Direct Mailers Be Sent: Direct mailers give you the ability to target existing customers, potential customers, or both. The choice is yours.

Why Should I Send Direct Mailers: Direct Mailers reinforce existing marketing campaigns such as your website, mass email campaigns, promotions and more. A lot of business is generated via direct mailers simply because it keeps customers thinking about your shop for their gift ideas.

Loranne Atwill, owner of Flower Shop Network, remembers customers coming into her flower shop for last-minute gift ideas. They had received her direct mailer but disregarded it for the moment. When it was time to buy the gift, they thought of her flower shop first because of the direct mailer.

How Do I Get A Bulk Mail Permit: Bulk mail permits are available through the United States Postal Service. These permits include an annual bulk mailing fee but sending several mailers throughout the year makes this a cost effective strategy. Contact your branch of the USPS or visit them online for more information about bulk mailing or to apply for your bulk mail permit.

HOW TO CREATE A DIRECT MAILER

Flower Shop Network now takes the guesswork out of creating direct mailers. You may now access direct mailer templates using your FSNf2f.com account. Templates are available for all major floral holidays and other occasions. If you like to create your own direct mailer, follow the instructions below.

A direct mailer can be created in a few easy steps. Keep in mind that you will need the following when creating your mailer:

  • a publishing program such as Microsoft Word (Note: This example uses word)
  • pictures of your arrangements uploaded to your computer or on  your website
  • contact information for your flower shop
  • a mailing list of existing/potential customers
  • pricing information

The first step to creating your direct mailer is to open a publishing program on your computer such as Microsoft Word, Works, or Publisher. Microsoft Word is the program used in these photo examples. Also open the pictures of your flower arrangements, either by viewing them on your website or in the “my pictures” folder of your computer.

There are two easy ways to upload photos to a Word document:  dragging and inserting. Whether you choose to add text or photos first, you may upload photos by dragging or inserting at any time. You may also rearrange the order and placement of the photos at any time.

This is what you will see when dragging files from a website or “my pictures” folder to a document program. The mirror image automatically appears to let you know that the photo is moving. It will disappear once it reaches the document program until you release the mouse button.

Dragging A Photo

Dragging A Photo

To drag photos into your document from your “my pictures” file or from your website:

  • select the photo that you would like to use by clicking on it once
  • click and hold the mouse button while dragging the photo to the document program
  • note:  you may drag the photo to the document tab at the menu bar on the bottom of the screen OR drag the photo into the open document program

This is what you will see when inserting files from your computer into a Microsoft Word document.

Inserting A Photo Using Microsoft Word

Inserting A Photo Using Microsoft Word

To insert your photo into the document using the document program:

  • click “insert” on the menu toolbar of the document program
  • hold the mouse over “picture” until a sidebar menu pops up
  • click “from file”
  • find the file in your documents (usually in “my pictures”)
  • double click the file OR single click the file and click insert under the picture preview button

The next step toward completing your direct mailer is to add pricing and contact information. The included information is up to you. Most customers will want to know the regular price and the promotional price. However, the only necessary inclusions are your contact information (name, phone number, address, email address, website URL) and promotional deal information.

Create the backside of the mailer by continuing to a new page inside the document program. Here you will place the information that will be seen before the mailer is opened. This can include just the return address information or promotional information for each “fold” of the mailer. Add this information in the same way as before.

Example Flyer --- Inside

Example Mailer --- Inside

Example Flyer --- Outside

Example Mailer --- Outside

Now your direct mailer is ready for the printer!

Aspects of Design: Reviving Neglected Vases & Containers

Ever have a vase that shows up one day with a mysterious defect such as a slight crack or scuffing? I have found a creative way to be able to keep the vase, use it, and make it prettier than before!

Regina Berryman and I were discussing new design techniques when we discovered a slight crack in a vase. It did not penetrate through to the inside (did not allow water leakage) but seemed to be the result of transportation. It also had a bit of scuffing around the defect. We used a tip that we’d learned to make this vase better than before—and all it took was some pot melting glue and spray paint.

First, Regina covered the vase in glue. Spreading the glue on with a thin piece of cardboard, this gave the vase a very unique texture. Note:  Trying to create this at home? Hot glue will work also. Simply use a Popsicle stick or something similar to maneuver the glue.

After the glue dried, Regina lightly spray painted the vase until it was covered in a silvery finish. You can use many colors here to accentuate the colors in your flower arrangements. We chose silver simply because it’s a very clean color that does not detract attention from the flowers.

After the glue dried, Regina applied paint to the vase.

After the glue dried, Regina applied paint to the vase.

The paint was allowed to dry until tacky. Then, powder was lightly applied by hand. This has the same affect as face powder over foundation. It simply creates a consistency that allows the paint to stay on better and maintain its appearance.

Here Regina applies powder to the paint. Believe it or not, it's Cascade® !

Here Regina applies powder to the paint. Believe it or not, it’s Cascade® !

Voila! A one-of-a-kind vase that looks better than ever!

The best hand model ever (me!) displaying a very creative vase.

The best hand model ever (me!) displaying a very creative vase.

Aspects of Design: The Shape of Creative Arrangements

"You Have My Heart" Romantic Arrangement

"You Have My Heart" Romantic Arrangement

Want to know what’s taking shape in the world of floral designers? In the age of floral wire and other creative accessories, line and form flowers are bending and shaping their way into hearts everywhere.

Speaking of bending into hearts, many people have asked how the designer of the “You Have My Heart” romantic arrangement created the heart shape from calcynia. The designer, Regina Berryman, explains that line flowers such as calcynia and heather can very easily be formed into this shape in just a matter of steps.

Cut the stem of the flower of choice until it forms a better angle for entry into wet floral foam. A standard wood pick with floral wire is the tool of choice for creating the shape. Simply hold the ends of the flowers together and wrap the wire around the tips. Use a high gauge (thin) wire as these are easier to disguise. Simply stick the wood pick in the floral foam and you’re ready to go with a great new shape!

Flowers with a stronger, hollow stem such as Bells of Ireland and equisetum also form shapes well. A slightly different technique can be used to create wavy shapes, curves, hearts and more. Simply cut the end of the flower to ease insertion into wet floral foam (if used). Insert a medium gauge floral wire into the stem and gently ease the wire through the stem, pushing through any knots that support the stem. The distance from the tip where the floral wire should stop is mostly a matter of judgment. This technique allows more flexibility in the flowers for a great shape.

A benefit to this design technique is that often flowers arrive to the local flower shop with more (or less) of a curve than expected. Where many flowers should be straight, packaging and light affect how upright they are upon arrival. These techniques help make lemonade from lemons, or in this case shapes from pretty flowers.

Regina cuts the flowers for freshness and ease of insertion.

Regina cuts the flowers for freshness and ease of insertion.

Insert the wire into the stem of the flower.

Insert the wire into the stem of the flower.

A better look at how easy this technique is!

A better look at how easy this technique is!

Here Regina inserts Bells of Ireland at a slight angle.

Here Regina inserts Bells of Ireland at a slight angle.

Here Regina forms the heart shape by adjusting the floral wire.

Here Regina forms the heart shape by adjusting the floral wire.

The other half!

The other half!

Beautiful flowers and a few bells around the rim complete the design.

Beautiful flowers and a few bells around the rim complete the design.

Eco-Friendly Practices: Saving Green While Going Green

With more and more consumers “going green” and encouraging environmentally friendly practices, flower shops are using tips like these to ensure the highest quality designs and products.

There are many benefits associated with more eco-conscious work habits. First, you gain the trust and patronage of conscientious consumers. Secondly, you reduce your energy dependence and energy bill by proxy. Another great benefit is that you encourage other people to adopt these habits. Every little bit helps.

On a side note, I know of an elementary school in my area that has used the money received from recycling alone to buy new playground equipment. With a student body of a few hundred K-2 students, the school has purchased more than a dozen new pieces of equipment thanks to the hard work of the students. Help keep our planet green for younger generations to enjoy beautiful flowers thanks to eco-friendly practices such as these:

  • Recycle paper, cardboard, plastic containers. Shredded newspaper comes in very handy as packing material. Cardboard boxes from a new shipment of vases can be used around the workstation to absorb water and protect that table from cuts. Empty milk jugs can be used to water plants or hold pre-mixed preservative. Print on both sides of the paper or cut used papers into squares for scrap paper.
  • Phase out / eliminate use of aerosol sprays.
  • Encourage and reuse returned containers. For example, offer a free arrangement with the return of 5 vases.
  • Buy local products when possible for a smaller carbon footprint. Buying products from local nurseries, growers, and suppliers helps keep travel costs down which reduces carbon monoxide emissions.
  • Turn off non-essential electrical appliances at day’s end. With the exception of security systems, floral refrigerators and other essential equipment, reduce your electricity bill and conserve energy by simply shutting off the lights and switching off your computer at the end of the day.
  • Favor the use of cloth towels over paper towels. Cloth towels will need regular cleaning but these costs are minimal when compared to continually supplying paper towels. Another option is to opt for durable shop towels over paper towels. These cloths tend to be made of stronger cloth fibers. Though as disposable as paper towels, shop towels tend to last longer under the stress of big jobs.
  • Fill delivery vehicles with gas during cooler times of the day. The popular belief is that gas vapors do not evaporate as quickly during the cooler morning and evening times. Therefore, you get more bang for your buck because you are gaining an extra fraction of a tank.
  • Recycle vase water by using on outdoor plants. Instead of taking a hose to outdoor plants, conserve water by using your vase water on outdoor plants. Instead of dumping the water from an arrangement that is a few days old, use it instead on outdoor plants.****This is only for clear vase water. If it has floral preservative in it you can not use it.*****
  • Replace standard light bulbs with energy efficient light bulbs. Looking much like a glass curly fry, these light bulbs come in a variety of watts but reduce wasted energy. Plus, they usually last as long if not longer.
  • Use plant-based cleaners to clean spills and workstations. Harmful chemicals can hurt the environment and your plants. Avoid using these chemicals and opt instead for plant based cleaners.

There are many ways to protect the environment. Energy efficiency is at the top of the headlines almost daily. Efforts to save the environment are gaining popularity and spreading like wildfire. Tips like these are a great place to start because they help everyone go green while saving some green.

Spring Into Prom With Flowers

Prom is almost here. You have the date, the dress, the shoes, the hair, and the car. What’s missing? The prom flowers!! The perfect corsage or boutonnière makes the difference between a fun yet elegant statement and a shabby accessory. Here are some tips for finding the perfect floral decorations for your night!

  • Prom Corsage Inspiration
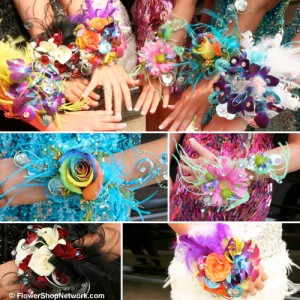
Find a decorative, matching corsage wristband! Diamonds are a girl’s best friend, but funky sequins, elegant gems, coral, and pearl with your corsage make just as beautiful a statement.
  • Small flowers or floral hair accessories are definitely an up-DO! These become an eye-catching way to show off the hair and makeup you worked so hard on, not to mention the aromatic fragrance they give your date when you’re dancing cheek to cheek.
  • Talk with your florist! These experts are sure to have creative ideas and unique arrangements to bring out even more beauty.
  • Know your budget! Don’t risk spending too much or passing over the perfect bouquet because you don’t know how much you would like to spend.
  • Doll up your date also! Matching boutonniere and cummerbunds not only are a stylish look but announce to prom guests that you and your date are the perfect stylish prom couple!
  • (Guys) Surprise your date with a bouquet! It’s an unexpected twist that your date will remember and probably brag to her friends about for days. Face it; she’s expecting the corsage. Go the extra mile for a date that she’ll love!

Find a local florist to design your perfect corsage or boutonniere.

Create a Unique Prom with Flowers in this Flower Shop Network newsletter you’ll find a variety of ways to make your prom special.